Misaligned tape can turn a convenient pre-taped masking film roll into uneven coverage, difficult unfolding, exposed edges, and avoidable waste in a body shop.
I inspect tape alignment by defining the tape-to-film position, measuring edge offset at repeated roll intervals, unfolding sample lengths, and recording drift, wrinkles, and bond gaps. I approve finished rolls across cartons, not only a short hand sample.
I keep this check separate from tape adhesion. A tape can stick well and still sit in the wrong position, wander along the roll, or capture the folded film unevenly.
What Tape-Alignment Details Should I Put in the Specification?
A request for “tape fixed to one edge” leaves too much room for different offsets, exposed film edges, winding directions, and inspection methods.
I specify the tape width, tape-to-film reference edge, allowed offset, film overlap, adhesive-side orientation, winding direction, fold position, and measurement method. I attach a finished-roll reference photo.
I Define One Clear Measurement Basis
I first identify the reference edge on the folded film. I state whether the tape should be flush with that edge, extend beyond it, or sit inward by an approved distance. I do not use words such as “centered” or “normal position” without a drawing. Those words can describe different constructions.
I record the full tape width and how much of that width contacts the film. The remaining tape area must be usable for attachment to the vehicle or masking surface. I also identify which side of the tape carries the film and which side remains available during application. This prevents a correct measurement from being taken on a reversed sample.
The folded film structure matters. A tape line can look straight before unfolding while one film layer sits outside the bond zone or a fold is trapped under the tape. I therefore show the folded cross-section and the fully opened direction in the approved specification.
| Specification field | What I record | Why I record it |
|---|---|---|
| Reference edge | Named folded-film edge or diagram | Creates one measurement origin |
| Tape position | Flush, inward, or outward relation | Prevents different interpretations |
| Film overlap | Approved bonded width on the tape | Keeps tape and film joined consistently |
| Free tape width | Usable tape exposed for application | Preserves the masking function |
| Winding direction | Leading edge and tape orientation | Supports correct dispensing |
| Fold relation | Layers included in the tape bond | Prevents trapped or missed layers |
I use the verified pre-taped masking film product page for relevant product options. I keep alignment dimensions in the purchase specification and approved sample.
How Do I Measure Tape Alignment on a Finished Roll?
A single measurement at the roll start can miss gradual drift, sudden correction, or a defect hidden deeper in the winding.
I mark repeated positions along an unwound sample, measure tape-to-film offset from the same reference edge, and record the direction of every change. I also unfold the film at each position.
I Combine Measurements with an Unfolding Check
I place the roll on a clean holder or stable bar so it unwinds in the intended direction. I avoid pulling the sample across a dirty floor because contamination or drag can distort the edge. I expose a practical starting length and allow the film to relax without stretching it.
At each chosen position, I place the same simple measuring tool perpendicular to the tape edge. I measure from the defined film reference edge to the agreed tape point. I record whether the tape moves inward or outward rather than writing only an absolute number. Direction shows whether the tape is drifting across the roll.
I inspect the same section before and after unfolding. I look for a trapped layer, an uneven fold, a film edge outside the bonded area, wrinkles between tape and film, and a change in the free tape width. I then continue to later positions so I can see whether a defect repeats or grows.
| Test step | Evidence I seek | Warning sign I record |
|---|---|---|
| Initial unwind | Stable leading edge and visible tape line | Telescoping or hidden edge |
| Offset measurement | Similar position against the reference | Progressive inward or outward drift |
| Bond-zone review | Film remains inside the approved area | Film edge crosses out of the bond |
| Unfolding trial | Layers open in the approved order | Tape traps or pulls a folded layer |
| Application check | Free tape width remains usable | Tape area becomes too narrow or uneven |
I do not stretch the film to make a poor line look straight. I measure the product in a relaxed state and use the same handling method for every supplier sample.
Which Tape-Alignment Defects Should I Reject?
Small visual changes may become large masking problems when they repeat through long rolls and many service jobs.
I reject tape that leaves the defined bond zone, captures the wrong layer, creates unusable free tape width, wrinkles repeatedly, or drifts beyond the agreed limit. I separate isolated handling marks from roll defects.
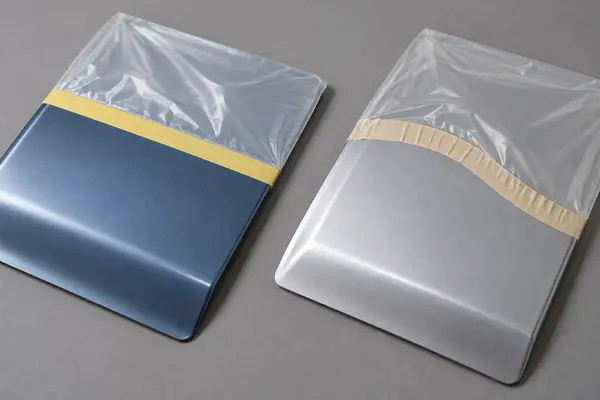
I Classify Position, Bond, and Fold Failures Separately
I treat continuous drift differently from one local wrinkle. Continuous drift suggests that the tape position changes as the roll progresses. A sudden step may indicate a splice, setup correction, or local converting problem. I record the exact position so the supplier can trace the event instead of receiving a general complaint.
I reject a tape line that exposes an intended bonded film edge or covers too much of the free tape area. I also reject repeated tape-to-film separation when it occurs together with poor overlap. If the overlap is correct but the bond fails, I move that issue to the separate adhesion investigation.
Trapped folds require their own decision. A roll may keep a straight outer tape line while the folded layers underneath are uneven. When opening pulls the tape out of line, tears the film, or leaves part of the coverage width trapped, I classify the problem as a combined alignment and folding defect.
| Defect pattern | My purchasing decision | Main reason |
|---|---|---|
| Progressive tape drift | Reject or hold the lot | Position changes through the roll |
| Film edge leaves bond zone | Reject | Tape-to-film connection is incomplete |
| Free tape width becomes unusable | Reject | Application function is reduced |
| Repeated wrinkles under tape | Reject or require correction | Edge sealing becomes inconsistent |
| Wrong film layer captured | Reject | Unfolding and coverage can fail |
| One external handling crease | Isolate and investigate | It may not represent production |
For tack, residue, and removal behavior, I use the verified pre-taped masking film adhesion test guide. I do not let an adhesion result replace this geometry check.
How Do I Control Alignment Across Bulk Rolls?
A perfect development roll does not protect an importer when later cartons contain different tape positions, folds, or winding direction.
I seal a finished reference roll, define carton-level sampling, measure several positions per sampled roll, and keep lot-linked photos and records. I require renewed approval after construction changes.
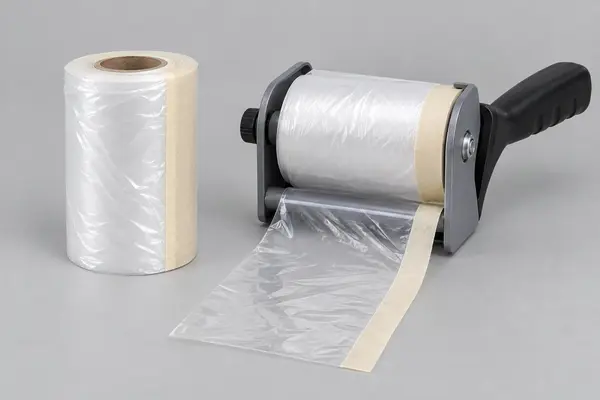
I Link Sample Approval to Receiving Inspection
I approve a sample made with the final film width, fold pattern, tape construction, core, winding direction, roll length, and packaging. I keep a photo showing the measurement reference and a short table of approved readings. A loose tape-and-film strip is not enough because it does not show roll drift.
For bulk inspection, I select cartons from different shipment positions and rolls from more than one carton. I examine the beginning and later sections of every sampled roll. The exact number of cartons, rolls, and positions depends on order size and risk, so I write it into the purchase documents before production.
| Control point | Record I keep | Decision supported |
|---|---|---|
| Development approval | Finished roll, diagram, and readings | Defines the target construction |
| First production review | Tape position and fold photos | Detects setup error early |
| Bulk sampling | Carton, roll, and interval results | Measures shipment consistency |
| Complaint review | Drift direction and defect position | Supports root-cause discussion |
| Reorder approval | Previous result and any correction | Prevents repeated alignment drift |
I use a raw-material selection process and do not use recycled production waste as substitute material. I also focus on stable quality, fair value, order quantity accuracy, and export-risk reduction. Those controls support consistency, but I still inspect tape alignment on finished rolls.
I check loading separately with the verified pre-taped masking film dispenser compatibility guide. A correctly aligned roll still needs the right core, width, winding direction, and cutter clearance.
I approve pre-taped masking film only when the specification, repeated measurements, unfolding checks, defect limits, and bulk sampling show stable tape-to-film alignment.