
Weak stitching can turn a soft fender cover into a paint-contact risk, especially when loose binding, hard thread ends, or open corners reach a vehicle.
I inspect automotive fender cover stitching by defining the seam construction, checking stitch consistency and edge coverage, flexing corners, finding exposed hard points, and sampling finished covers across cartons. I approve the complete bound edge, not only the center material.
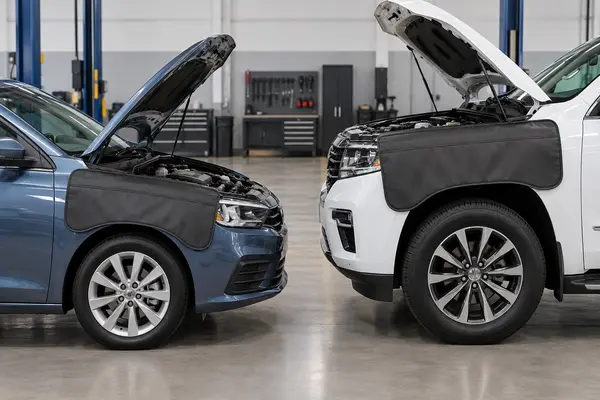
I treat edge workmanship as a separate purchasing requirement. A good face material cannot compensate for a rough perimeter, missed stitches, or a corner that opens during normal handling.
What Stitching and Binding Details Should I Specify?
A request for “reinforced edges” sounds useful, but suppliers can interpret it differently and deliver covers that look similar while using different construction.
I specify the binding material, finished width, seam path, stitch appearance, corner construction, thread color, attachment enclosures, and acceptable hard-point condition. I approve a finished reference cover with clear detail photos.
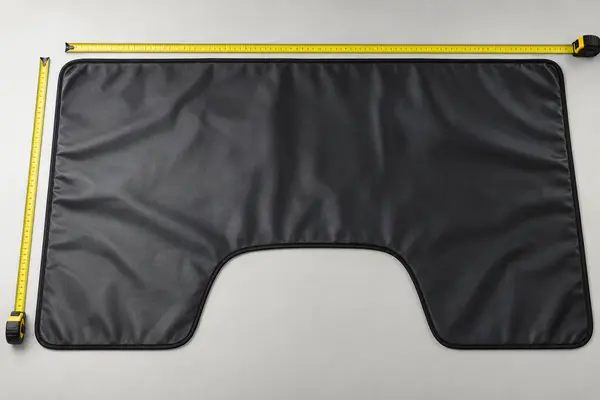
I Define the Edge as a Construction System
I begin with a simple cross-section description. I state which layers the binding must capture and whether the edge encloses face material, padding, and paint-side backing together. I do not rely on a product photo to explain that detail. A front view can hide a narrow binding, missed backing layer, or exposed cut edge.
I define the visible result instead of inventing a universal stitch number. I record the approved stitch spacing, seam distance from the binding edge, thread appearance, and start-and-finish method from the sample. I ask for secure backstitching or another agreed finishing method at the seam ends. I also identify any corner overlap, joint, or curved area that needs special attention.
Attachment points belong in the same construction map. If the cover uses magnets, hooks, elastic, or weighted sections, I specify how those parts are enclosed. No hard component, sharp thread end, or rough binding joint should reach the paint-contact side.
| Specification field | What I record | Purchasing purpose |
|---|---|---|
| Binding material | Approved type, feel, color, and sample | Controls edge contact and appearance |
| Finished edge width | Agreed visible width and tolerance method | Keeps coverage consistent |
| Stitch line | Approved spacing and position | Makes workmanship comparable |
| Corner method | Fold, overlap, curve, and joint location | Reduces open or bulky corners |
| Seam finish | Approved start, end, and thread trimming | Prevents loose ends |
| Attachment enclosure | Layer and location around magnets or hooks | Prevents hard contact points |
I choose the main layers separately with the verified automotive fender cover material guide. This article keeps the buying decision centered on edge construction.
How Do I Inspect Stitching and Edge Binding on a Sample?
A quick front-side glance can miss skipped stitches, backing that escapes the binding, loose thread ends, and rough joints on the paint-contact side.
I inspect both faces under good light, trace the whole perimeter by hand, compare stitch spacing, flex every corner, and check attachment zones. I record each defect by position.

I Follow One Repeatable Inspection Route
I lay the clean cover flat with the working face upward. I start at a marked corner and follow the perimeter in one direction. I look for a straight stitch path, stable edge width, thread loops, skipped stitches, puckering, and needle damage. I do not inspect only the longest straight side because short curves and corners often show more variation.
I turn the cover over and repeat the route on the paint-contact side. I run a clean hand lightly across the binding, seam ends, and attachment pockets. I stop when I feel a hard knot, sharp thread end, uncovered insert, thick overlap, or dried adhesive. I do not rub an unapproved sample on a vehicle finish to discover a hard point.
I gently flex each corner and roll a short section of the edge between my fingers. The binding should stay closed and continue holding all intended layers. I then place the cover on a clean representative panel or protected test surface to see whether the bound edge lies flat without a raised joint pressing into the surface.
| Inspection step | Acceptable evidence I seek | Warning sign I record |
|---|---|---|
| Front perimeter review | Even seam path and covered raw edge | Wandering line or exposed layer |
| Back-side touch check | Soft, clean contact surface | Hard knot, burr, or rough thread end |
| Corner flex | Binding remains closed | Opening joint or broken stitch |
| Edge roll | Layers stay captured | Backing slips out of the binding |
| Attachment-zone check | Hard part remains fully enclosed | Magnet, hook, or fastener can touch paint |
I photograph the full cover first, then the defect close-up with a location reference. That sequence prevents confusion when several corners or cartons are under review.
Which Stitching and Binding Defects Should I Reject?
Cosmetic variation and functional risk are not the same, so unclear defect limits can create arguments after a shipment arrives.
I reject exposed hard points, open binding, repeated skipped stitches, seam breaks, uncaptured layers, sharp thread ends, and joints that press against paint. I separate minor appearance variation from functional defects.
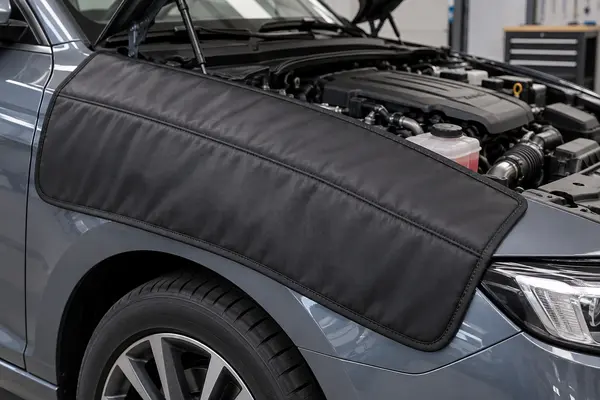
I Classify Defects by Contact and Durability Risk
I treat anything that can touch painted bodywork as critical to the buying decision. An exposed magnet edge, hard plastic corner, wire end, rough melted thread, or abrasive binding joint is not acceptable merely because the center pad feels soft. I also reject contamination, metal fragments, or trapped hard particles on the backing.
I classify an open corner or a seam break as a functional defect when it releases padding, backing, or an attachment component. Repeated skipped stitches can also weaken the perimeter even when the edge has not opened yet. I document the length and location rather than describing the problem only as “poor sewing.”
Small color variation in matching thread or a slight visual waviness may be cosmetic when it stays inside the agreed reference and does not affect contact, layer capture, or appearance requirements. I still record it if branding or premium presentation matters. I make the acceptance rule before production, not after seeing a disputed shipment.
| Defect | My normal decision | Reason |
|---|---|---|
| Exposed hard component on paint side | Reject | Direct surface-contact risk |
| Open corner or binding gap | Reject | Layers or inserts can escape |
| Repeated skipped stitches | Reject or hold for review | Edge strength may be inconsistent |
| Sharp or untrimmed thread end | Reject | Contact and handling risk |
| Uncaptured backing layer | Reject | Cover construction is incomplete |
| Minor visual waviness within reference | Record and compare | May be cosmetic only |
I avoid unsupported durability claims from one pull. My inspection identifies construction consistency and visible failure patterns; it does not prove an unlimited service life.
How Do I Control Edge Workmanship Across a Bulk Order?
A polished development sample does not protect an importer when later cartons contain different corners, seam endings, or attachment enclosures.
I seal a reference cover, define carton-level sampling, inspect high-risk edge zones, record defects by lot, and link repeated failures to corrective action. I keep the finished product as the approval basis.
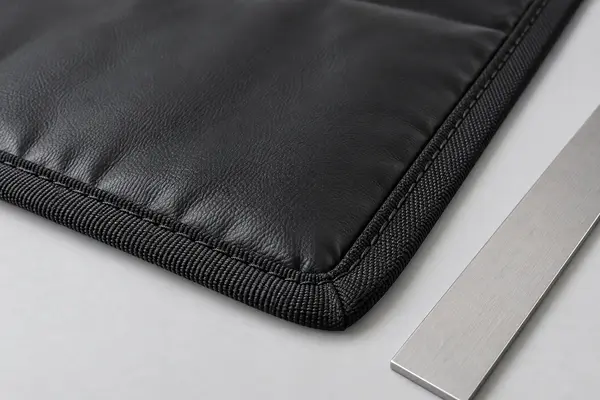
I Connect Sample Approval to Receiving Inspection
I approve a production-ready cover with the final material layers, dimensions, binding, thread, attachments, logo position, and packaging. I keep detail photos of all corners, seam starts, seam ends, and attachment zones. If the cover is custom shaped, I also retain the approved outline and measurement method.
During receiving inspection, I select cartons from different shipment positions and covers from different packs. I inspect the full perimeter on every sampled piece, then give extra attention to corners, curves, binding joints, logo-adjacent seams, magnet pockets, hook points, and weighted sections. The exact sample quantity depends on order size and risk, so I state it in the purchase documents.
| Control point | Evidence I keep | Decision supported |
|---|---|---|
| Development approval | Finished reference and edge photos | Defines the expected construction |
| Production check | Lot identity and high-risk-zone images | Finds variation before shipment |
| Receiving inspection | Carton positions and defect records | Measures bulk consistency |
| Complaint review | Cover location, edge position, and close-up | Supports root-cause discussion |
| Reorder review | Prior defects and agreed correction | Prevents repeated workmanship drift |
I use a raw-material selection process and do not use recycled production waste as substitute material. I also focus on stable quality, fair value, order quantity accuracy, and export-risk reduction. I still inspect the finished stitching because material control alone cannot confirm edge workmanship.
I use the verified fender cover size guide for coverage decisions and the custom automotive fender cover page for relevant product options.
I approve automotive fender covers only when the specified binding, complete perimeter inspection, defect limits, and bulk sampling show a consistently soft and closed edge.