
I can buy a well-made fender cover and still leave paint exposed when the finished size does not match the vehicles, work position, or attachment layout.
I choose automotive fender cover size by mapping the painted contact area on representative vehicles, measuring finished coverage, and testing access, attachment, edge position, and movement during real service motions. For mixed fleets, I approve more than one size when one cover cannot fit safely and consistently.
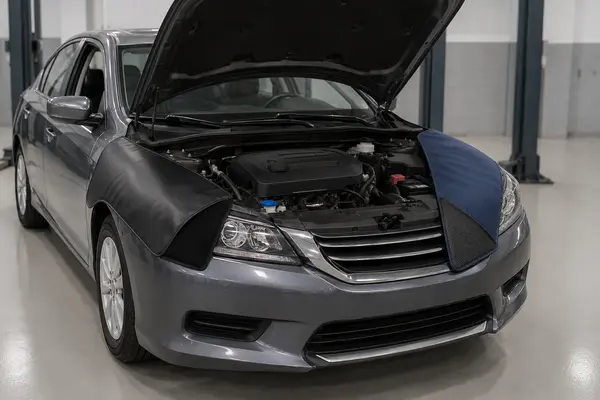
I treat size as a tested coverage decision, not a “universal” label. A simple vehicle map and sample record help me compare suppliers and repeat the order accurately.
Which Areas Should My Fender Cover Protect?
I can cover a large area and still miss the paint where technicians lean, place cables, or move tools during engine-bay work.
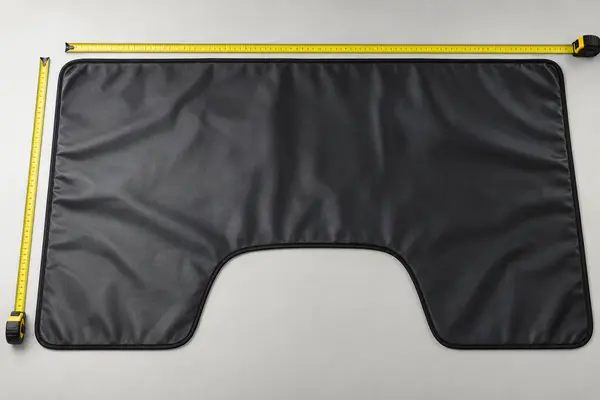
I map the fender top, outer edge, hood-side lip, headlamp corner, and technician contact zone. I then keep the cover clear of moving, hot, or service-access areas.
I Build a Coverage Map Before I Request a Size
I begin with the actual repair position. I note where a technician's clothing, belt, forearm, hoses, and light cables may contact painted surfaces. I do not assume the largest rectangle gives the best result. Extra material can hang into an unsuitable area, block access, or make secure placement harder.
I mark the required protected zone on several representative vehicles. My map separates the horizontal fender top from the curved outer shoulder and the narrow edge near the engine bay. I also note shapes around lamps, mirrors, hood hinges, and other nearby features. I keep this exercise simple: I want a practical drawing or photo record that purchasing and inspection teams can repeat.
I never place a sample where it can interfere with belts, fans, hot components, hood hardware, or the technician's safe access. The cover protects painted bodywork; it does not replace workshop safety rules. I also check that bindings, magnets, hooks, weights, or seams do not create a hard contact point against paint.
| Coverage zone | What I observe | What I record |
|---|---|---|
| Fender top | Main leaning and working area | Required protected length and width |
| Outer shoulder | Clothing and cable contact | Needed drape and edge position |
| Hood-side lip | Tools and hands near the bay | Safe overlap without interference |
| Front corner | Headlamp and grille-side exposure | Shape or taper requirement |
| Paint-side contact | Backing, seams, and hardware | Areas that must stay soft and clean |
I use the custom car fender cover page to identify available constructions, but I approve coverage on the intended vehicle group before ordering.
How Should I Measure a Finished Fender Cover?
I create disputes when I compare a cut-material size with a finished bound cover, or when suppliers measure curves and attachments in different ways.
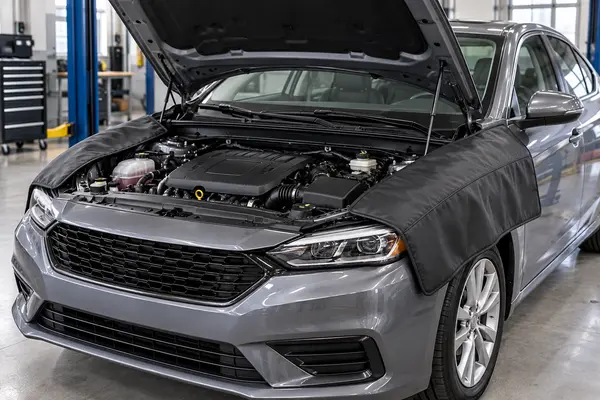
I specify finished width, finished length, shape, cutouts, and attachment positions with one drawing. I state whether measurements include bindings, pockets, hooks, weights, or other hardware.
I Use One Measurement Method for Every Supplier
I lay the finished cover flat without stretching it. I define the top, bottom, vehicle side, and technician side on the drawing. For a rectangular cover, I measure finished length and width between agreed edge points. For a shaped cover, I add the narrowest and widest sections, relevant curves, and the position of any notch or cutout.
I measure the visible finished product, not only the cutting pattern. Binding and seam allowance can change the usable coverage. Thick edges, magnet pockets, tool ridges, or weighted sections can also change where the soft contact area begins. I therefore show these features separately on the drawing.
Attachment positions need fixed reference points. I record the distance from a chosen finished edge to each magnet pocket, hook, strap, or weight. I also identify whether the hardware sits inside the measured boundary or extends beyond it. This prevents two quotations with the same headline size from producing different installed coverage.
| Specification field | My measurement rule | Why it matters |
|---|---|---|
| Finished length | Agreed edge to edge, flat | Controls front-to-rear coverage |
| Finished width | Agreed side to side, flat | Controls drape and paint protection |
| Shape or cutout | Drawing with reference points | Prevents blocked access or exposed corners |
| Binding width | Visible finished edge | Defines the usable soft area |
| Attachment position | From fixed finished edges | Connects size to installed stability |
| Set contents | Each piece measured separately | Prevents missing or mismatched pieces |
I connect size to construction because a padded cover and a thin textile cover can drape differently even when their flat dimensions match. My fender cover material guide handles that separate material decision.
How Do I Test One Size Across a Mixed Vehicle Fleet?
I risk calling a cover universal after testing one easy vehicle, while wider SUVs, steep fenders, and non-magnetic panels reveal different problems.
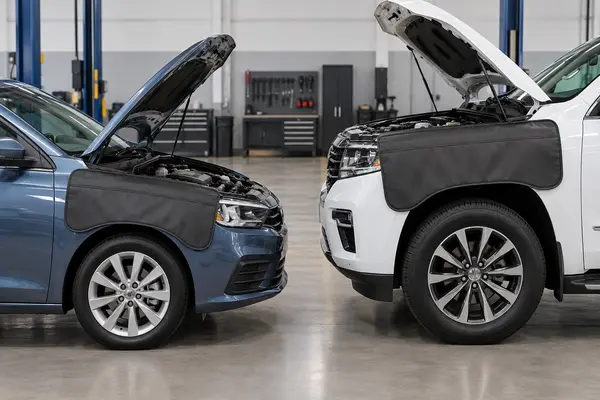
I test the sample on a planned vehicle matrix, including different body sizes, fender shapes, and panel materials. I record protected zones, access, stability, and edge behavior for each vehicle.
I Approve a Vehicle Matrix, Not a Marketing Label
I select vehicles that represent the buyer's work rather than choosing only the most convenient model. My matrix may include a compact passenger car, a mid-size vehicle, a larger SUV or pickup, and any common special body shape in the fleet. I also note whether the panel is suitable for the chosen attachment method.
On each vehicle, I clean the panel and paint-side backing before placement. I position the cover using the intended magnets, hooks, weights, or non-slip construction. I then simulate normal reach, leaning, cable movement, and access to the planned service points. I watch for exposed paint, edge lift, bunching, sliding, hardware pressure, or material hanging into an unsuitable area.
I do not stretch a sample beyond its normal shape to claim a fit. I also avoid letting extra size hide a poor attachment choice. If one cover works well on compact cars but becomes unstable on larger or more curved fenders, I approve a second size or a different configuration. That is often clearer than forcing one item code across every vehicle.
| Vehicle test | Pass evidence I retain | Possible decision |
|---|---|---|
| Compact car | Required zones covered without obstruction | Keep standard size |
| Mid-size vehicle | Stable during normal service motion | Confirm common size |
| SUV or pickup | Adequate drape and secure position | Add larger size if needed |
| Non-magnetic panel | Chosen attachment works safely | Use hook, weight, or non-slip option |
| Curved fender | No hard edge, bunching, or exposed zone | Adjust shape or construction |
I keep attachment selection separate by using my magnetic, hook, and weighted fender cover guide. Size and attachment must work together, but they answer different purchase questions.
What Should I Put in My Order and Receiving Check?
I can approve the right sample and still receive the wrong coverage when my order uses only “large,” “standard,” or “universal” as the size description.
I attach the dimensioned drawing, vehicle matrix, approved sample reference, set contents, packing details, and inspection method to the order. I repeat key measurements and fit checks at receiving.
I Turn the Coverage Decision into a Repeatable Specification
I name the product precisely as a reusable automotive mechanic fender cover. I record the item code, finished dimensions, shape, material layers, backing, edge binding, attachment method, hardware positions, color, print details, and set contents. If the order includes left, right, and center pieces, I describe and measure each piece separately.
I add the approved coverage photos or drawing and list the representative vehicles used during testing. I do not claim that the sample fits every vehicle outside that matrix. If the buyer later adds a new vehicle class, I run another fit review instead of extending the approval without evidence.
Packing also affects size at arrival. I state how each cover is folded or rolled, pieces per inner pack, sets per carton, carton dimensions, gross weight, item code, and carton marks. At receiving, I sample different cartons and check identity, finished dimensions, shape, attachments, edge condition, backing cleanliness, fold recovery, set count, and representative fit.
I use a raw-material selection process and do not use recycled production waste as substitute material. I focus on stable quality, fair value, order quantity accuracy, and export-risk reduction. I still rely on written specifications, approved samples, and inspection records rather than turning these priorities into unsupported guarantees.
I choose fender cover size from measured coverage and vehicle trials, then lock the finished dimensions, attachment layout, set contents, packing, and receiving checks into the order.