
Dust inside a disposable mixing cup can enter a paint job before the technician starts. I inspect the cup, sleeve, and carton as one cleanliness system.
I check cups under controlled light, inspect rims and bases, examine nested contact surfaces, open inner packs, and document dust, residue, odor, or damaged packaging before releasing a bulk order.
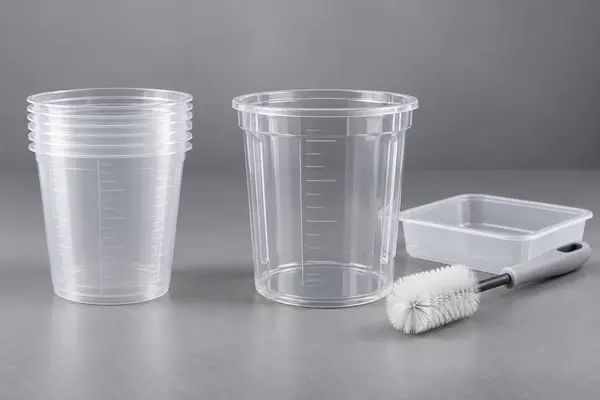
I treat a clean starting condition as a buyer requirement. A transparent cup can look clear from a distance while fine particles sit on the base or rim. My receiving method below helps me separate a one-off handling issue from a packaging problem that can repeat across a shipment.
What does a clean disposable paint mixing cup mean?
“Looks clean” is too vague for a purchase order. I first define the surfaces and packaging that must be free from visible contamination.
I define a clean cup as a transparent cup with no visible dust, fibers, oily film, foreign particles, objectionable odor, or packaging debris on the intended paint-contact surfaces.
I separate visible cleanliness from material claims
I inspect what the buyer can verify. I do not turn a visual check into an unsupported claim about sterilization or universal chemical compatibility.
| Area | What I inspect | Why it matters |
|---|---|---|
| Inside wall | Dust, fibers, droplets, film | Particles can enter the mix |
| Base corner | Settled debris and residue | Hard-to-see contamination collects here |
| Rim | Nicks, powder, nesting marks | Rim contacts lids and tools |
| Printed scale | Smear, flakes, transfer | Marking debris can enter paint |
| Inner pack | Open seams, dust, loose fibers | Pack protects cups before use |
Dive Deeper
I begin by reviewing the agreed product description. I confirm cup material, capacity, printed scales, lid style, inner-pack method, carton quantity, and intended single-use rule. I do not assume that a cup sold for paint preparation is automatically clean enough for every coating process. I ask the supplier to identify the actual packing sequence and the surfaces that may contact paint.
I inspect the sample in a clean receiving area, away from sanding dust and open solvent containers. I use a neutral background and strong side light so particles show against the transparent wall. I avoid blowing into the cup because that can add moisture, fibers, or particles from my own clothing. I handle the cup by the outside wall and wear clean gloves when the approval procedure requires them.
I record visible contamination by location rather than writing “dirty.” For example, I note “two dark fibers on the inside base” or “powder at the nested rim.” That language gives the supplier a useful corrective-action target. I also photograph the cup beside its inner-pack label and lot code. A clear photo cannot prove that every cup in a carton is clean, but it creates a traceable record for the sample I inspected.
How should I inspect nested cups and contact surfaces?
Nested cups can transfer dust or print residue from one rim to the next. I inspect the stack, not only the first cup visible in the sleeve.
I remove cups one at a time, inspect the outside contact rings and inside base, and check several positions from the top, middle, and bottom of each sampled stack.
I control the unstacking sequence
I use a clean tray for inspected cups and keep approved and rejected samples separate. I do not return a touched cup to the original stack.
| Stack position | My check | Record |
|---|---|---|
| Top | Surface and rim after opening | Dust, fibers, print transfer |
| Middle | Contact marks and settled particles | Cup number and photo |
| Bottom | Compression and packaging debris | Stack and carton code |
Dive Deeper
I start with the outside of the inner pack. I look for crushed corners, open seams, dampness, powder, and loose fibers. If the bag or sleeve is open, I note whether the opening could have allowed warehouse dust inside. I do not blame the cup material before checking the pack that protected it.
I remove the first cup slowly. I inspect its rim, then place it on the clean tray. I repeat the process with middle and lower cups. I compare the inside base with the outside contact ring because residue may transfer from one area to the next. If cups stick together, I record whether the cause is static, nesting pressure, surface tack, dust, or a damaged rim. I keep this cleanliness test separate from stack separation: a cup can release easily and still carry visible particles.
I inspect printed graduations and ratio markings for flakes, smears, or loose ink. I do not scrape the print to create an artificial failure. I use normal handling and record what a technician could encounter. If a cup has a lid, I inspect the lid underside and the rim interface as separate surfaces. I never assume a matching lid is clean merely because it fits correctly.
How do I check inner packs and cartons for contamination risk?
A clean sample can become dusty in a weak inner pack. I inspect how the shipment protects the cups during storage and opening.
I check sealed inner packs, carton seams, liners, labels, and loose packaging fibers, then compare cups from more than one carton before approving the lot.
I inspect packaging as part of the product
I record whether cups are bagged, sleeved, or placed directly in the carton. I note any packaging change from the approved sample.
| Packaging point | My action | Release concern |
|---|---|---|
| Inner seal | Inspect closure and tears | Open packs can collect dust |
| Carton interior | Look for flakes and fibers | Debris can transfer during transport |
| Carton seams | Check dust paths and crushed areas | Damage can expose product |
| Labels | Match item and lot | Prevents mixed inspection records |
Dive Deeper
I open cartons in the same order that a warehouse worker would. I photograph the closed carton, label, inner packs, and first exposed stack. I do not shake the carton to see what falls out because that changes the evidence and can spread debris onto clean cups. I use a clean inspection tray and close the carton when I finish a sample.
I sample different carton positions and, when possible, different pallet layers. I compare the first carton with a carton from the middle and another from the outside. If only one carton shows fibers or dust, I isolate it and expand the inspection around that code. If the condition repeats, I hold the lot and ask the supplier to review packing, warehouse handling, and carton closure.
I also check odor and moisture without placing my face over the cup. I use the agreed receiving safety practice and record an unusual solvent-like or musty odor as a separate observation. I do not claim that a neutral odor proves compatibility. It only tells me whether the sample matches the approved starting condition.
How should I write a cleanliness acceptance rule?
Without a written rule, a buyer may accept one dusty carton and reject another for the same reason. I turn observations into a release decision.
I define the inspected surfaces, lighting, sample positions, visible-particle rule, packaging condition, photo record, and remedy for failed cartons before production.
I use a simple release form
I keep cleanliness separate from dimensional and fit checks but link every result to the same lot and item code.
| Control field | My requirement |
|---|---|
| Sample source | Multiple cartons and stack positions |
| Lighting | Neutral background with controlled side light |
| Surface rule | No visible foreign particles on paint-contact areas |
| Packaging rule | Inner pack closed, dry, and free from loose debris |
| Remedy | Hold, sort, replace, or credit according to agreement |
Dive Deeper
I attach photographs of acceptable and rejected examples to the purchase file. I write “visible fiber on inner base” instead of “poor cleanliness.” I identify the carton, stack position, cup number, operator, date, and lighting condition. This record helps both sides review a claim without relying on memory.
I also state how the supplier must protect the approved condition after production. I ask for the same cup material, printing, lid, inner pack, carton, and storage method as the approved sample. If any one changes, I request a new sample check. I do not invent a certification or guarantee from this visual inspection.
As a manufacturer, I use a raw-material selection process and do not use recycled production waste as a substitute material. I focus on stable quality, fair value, order quantity accuracy, export-risk reduction, experienced production staff, and flexible production lines for large orders. I still expect the buyer to approve the actual cup, pack, and receiving method.
I release disposable paint mixing cups only when the cup surfaces, printed areas, inner packs, and cartons meet the written cleanliness rule.